
A travel trailer gives you freedom. You can wake up beside a quiet lake, park near mountain trails, or spend nights under open desert skies. But when temperatures drop, that freedom depends on one important system, your furnace.
When it works, you hardly notice it. Warm air quietly flows through the vents while you relax inside. When it stops working, though, the cold creeps in quickly. Suddenly your cozy trailer feels more like a metal refrigerator.
Here’s the encouraging part. Most Travel Trailer Furnace Repair problems are not complicated mechanical disasters. Often the issue is surprisingly simple. Dust buildup. A blocked vent. A loose wire. Maybe even a propane tank that ran empty overnight.
This expert guide explains exactly how a travel trailer furnace works. You’ll also learn how to diagnose common problems and perform basic travel trailer furnace repair safely. With a little patience and the right approach, you can solve many heating issues yourself and stay warm wherever the road takes you.
How a Travel Trailer Furnace Works
Before attempting any repair, it helps to understand how the furnace operates. Many RV owners assume the system is extremely complex. In reality, the heating process follows a clear sequence.
Once you understand that sequence, troubleshooting becomes much easier.
Key Components Inside an RV Furnace
Several important components work together to produce heat inside your trailer.
Thermostat
The thermostat controls the entire system. When the interior temperature drops below the setting, the thermostat signals the furnace to start heating.
Blower Motor
The blower motor pushes air through the furnace system. It performs two critical tasks. First, it supplies oxygen for combustion. Second, it moves warm air through the trailer’s duct system.
Sail Switch
The sail switch detects airflow from the blower. If airflow reaches the proper level, the switch activates and allows the ignition system to start.
Dust buildup often interferes with this switch. In fact, many travel trailer furnace repair cases involve a dirty sail switch.
Ignition System
Modern RV furnaces use electronic ignition. When activated, the system produces a spark that lights the propane gas mixture inside the burner chamber.
Burner Assembly
The burner mixes propane and oxygen to create the flame that produces heat.
Heat Exchanger
This metal chamber transfers heat from the burner to the circulating air while keeping combustion gases separate from the air inside your trailer.
Exhaust Vent
After combustion occurs, gases exit the furnace through the exterior exhaust vent. If the vent becomes blocked, the furnace may shut down automatically for safety.
The RV Furnace Heating Cycle Explained
A travel trailer furnace follows a specific order of operation.
- Thermostat calls for heat
- Blower motor starts running
- Sail switch detects airflow
- Ignition system produces a spark
- Propane burner ignites
- Warm air circulates through the trailer
If any step in this sequence fails, the furnace will shut down. Understanding this process makes Travel Trailer Furnace Repair far easier because each symptom points to a specific stage in the heating cycle.
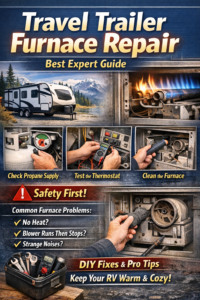
Common Travel Trailer Furnace Problems
Even well-maintained furnaces eventually develop issues. Fortunately, the symptoms usually make it possible to identify the cause.
Let’s explore the most common problems that require Travel Trailer Furnace Repair.
Furnace Blower Runs But No Heat
One confusing issue happens when the blower motor runs normally but the furnace produces no heat.
Several things can cause this problem:
- Empty propane tank
- Closed propane valve
- Dirty burner assembly
- Faulty ignition electrode
- Gas valve malfunction
Always begin with the simplest possibility. Check the propane tank first. Many RV owners spend time troubleshooting only to discover the propane supply is empty.
If propane levels are fine, inspect the burner assembly for dirt or corrosion.
Travel Trailer Furnace Won’t Turn On
Sometimes the furnace remains completely silent. When that happens, the issue usually involves the electrical system.
Common causes include:
- Dead thermostat batteries
- Blown RV fuse
- Loose wiring connections
- Faulty control board
Start with the thermostat. Replace the batteries even if they appear functional. Weak batteries sometimes fail to trigger the furnace.
Next, inspect the fuse panel. Travel trailer furnaces usually run on a 12-volt electrical circuit.
Furnace Starts Then Shuts Off Quickly
Short cycling occurs when the furnace starts heating but stops within a few seconds.
Possible causes include:
- Blocked air vents
- Dirty sail switch
- Restricted airflow
- Overheating protection system activating
Furnaces depend on proper airflow. If vents become blocked by furniture or bedding, the system overheats and shuts down automatically.
Cleaning the sail switch often solves this issue.
Strange Furnace Noises
Your furnace should run quietly. Unusual sounds often signal mechanical problems.
Grinding noises may indicate a worn blower motor bearing. Clicking sounds could point to ignition issues. Rattling noises usually mean something inside the furnace housing has loosened.
Address unusual noises early. Small mechanical problems often become larger repairs if ignored.
Essential Tools for Travel Trailer Furnace Repair
You don’t need a professional workshop to perform basic Travel Trailer Furnace Repair. A few simple tools can help diagnose most problems.
Here are the essentials:
| Tool | Purpose |
| Multimeter | Tests voltage and electrical connections |
| Screwdriver set | Removes furnace panels |
| Compressed air | Cleans dust and debris |
| Soft brush | Cleans burner components |
| Flashlight | Helps inspect internal parts |
Dust removal deserves special attention. RV furnaces often sit near the floor where debris collects easily. Over time, that dust interferes with sensors and airflow.
Step-by-Step Travel Trailer Furnace Repair Guide
This simple troubleshooting process solves many furnace problems.
Work slowly and carefully. Always keep safety in mind.
Step 1: Check the Propane Supply
Start with the obvious.
Confirm the propane tank contains fuel. Ensure the valve is fully open. Also inspect the regulator for signs of damage.
Low propane pressure can prevent proper ignition.
Step 2: Inspect the Thermostat
Thermostats cause more travel trailer furnace repair issues than many people realize.
Check the following:
- Heating mode selected
- Fresh batteries installed
- Wires securely connected
- Temperature setting above room temperature
If the thermostat fails to send the signal, the furnace will never start.
Step 3: Clean the Furnace
Dust buildup is one of the most common furnace problems.
Turn off propane and disconnect electrical power before cleaning. Remove the furnace access panel and use compressed air to blow away dust.
A soft brush can remove stubborn debris.
Sometimes cleaning alone restores normal furnace operation.
Step 4: Inspect the Sail Switch
The sail switch detects airflow from the blower motor.
If dust prevents it from moving freely, ignition will not occur. Carefully clean around the switch area.
Avoid bending the delicate metal arm.
Step 5: Test the Igniter
The ignition electrode produces the spark that lights propane.
Look for warning signs such as:
- Weak spark
- Carbon buildup
- Cracked ceramic insulation
Cleaning may restore the spark. If the electrode appears damaged, replacement may be necessary.
Travel Trailer Furnace Maintenance Tips
Routine maintenance reduces the need for Travel Trailer Furnace Repair.
Think of it like caring for your vehicle engine. Small efforts now prevent major problems later.
Seasonal Furnace Maintenance Checklist
Before cold weather trips, perform a quick inspection.
- Check propane supply
- Clean furnace vents
- Test thermostat operation
- Inspect electrical connections
- Examine the exterior exhaust vent
This entire process takes only a few minutes but can prevent frustrating heating failures.
Keep Airflow Clear
Proper airflow is essential for furnace performance.
Keep floor vents clear of rugs, boxes, and furniture. Also inspect the exterior vent regularly. Insects and debris sometimes block these openings.
When to Replace Instead of Repair
Eventually every furnace reaches the end of its life.
Most travel trailer furnaces last between ten and twenty years depending on usage and maintenance.
Warning signs that replacement may be necessary include:
- Furnace older than fifteen years
- Frequent ignition failures
- Cracked heat exchanger
- High propane consumption
A cracked heat exchanger is particularly serious because it may allow exhaust gases to enter the living space.
Travel Trailer Furnace Repair Cost
Repair costs vary depending on the problem and labor rates.
Typical ranges include:
| Repair Type | Average Cost |
| Thermostat replacement | $50 – $150 |
| Sail switch repair | $80 – $200 |
| Igniter replacement | $100 – $300 |
| Furnace replacement | $600 – $1500 |
Sometimes a simple DIY repair saves hundreds of dollars.
DIY Travel Trailer Furnace Repair vs Professional Repair
Many furnace problems are safe for owners to fix themselves.
DIY Repairs
You can usually handle:
- Cleaning furnace components
- Checking propane supply
- Replacing thermostat batteries
- Clearing blocked vents
Professional Repairs
However, certain repairs require professional help.
- Gas valve replacement
- Circuit board problems
- Heat exchanger damage
- Complex electrical issues
If propane leaks or combustion problems appear, contact an RV technician immediately.
Safety Tips When Repairing an RV Furnace
Safety always comes first when performing Travel Trailer Furnace Repair.
Follow these important guidelines:
- Turn off propane before beginning repairs
- Disconnect trailer power
- Work in a ventilated area
- Check for gas leaks afterward
Helpful safety information is available at:
Expert Tips to Keep Your Travel Trailer Furnace Running All Winter
Experienced RV travelers rely on simple habits to keep their furnaces reliable.
Run the furnace briefly once each month during storage. This keeps components moving and prevents dust buildup.
Install a small furnace filter near the intake vent to capture dust. Also carry spare fuses and thermostat batteries during trips.
After driving on dusty roads, inspect furnace vents. Dust entering the system during travel often causes airflow problems later.
These small habits reduce the chance of unexpected Travel Trailer Furnace Repair situations.
Frequently Asked Questions About Travel Trailer Furnace Repair
Why does my RV furnace blow cold air before heating?
The blower motor starts before ignition occurs. This step establishes airflow for safe combustion.
How long does an RV furnace usually last?
Most units operate for ten to twenty years with proper maintenance.
Can I run my furnace while driving?
Some RV owners do, but many manufacturers discourage it due to propane safety concerns. Always check your owner’s manual.
Why does my furnace smell when it first starts?
Dust burns off the heat exchanger after storage. The smell usually disappears after several heating cycles.
Final Thoughts on Travel Trailer Furnace Repair
A broken furnace can ruin an otherwise perfect camping trip. Fortunately, most Travel Trailer Furnace Repair problems have simple causes.
Dust buildup, weak batteries, or restricted airflow account for many furnace failures. With a little knowledge and regular maintenance, you can diagnose issues quickly and keep your heating system working reliably.