RetroPie for Raspberry Pi 5: Complete Setup and Gaming Guide

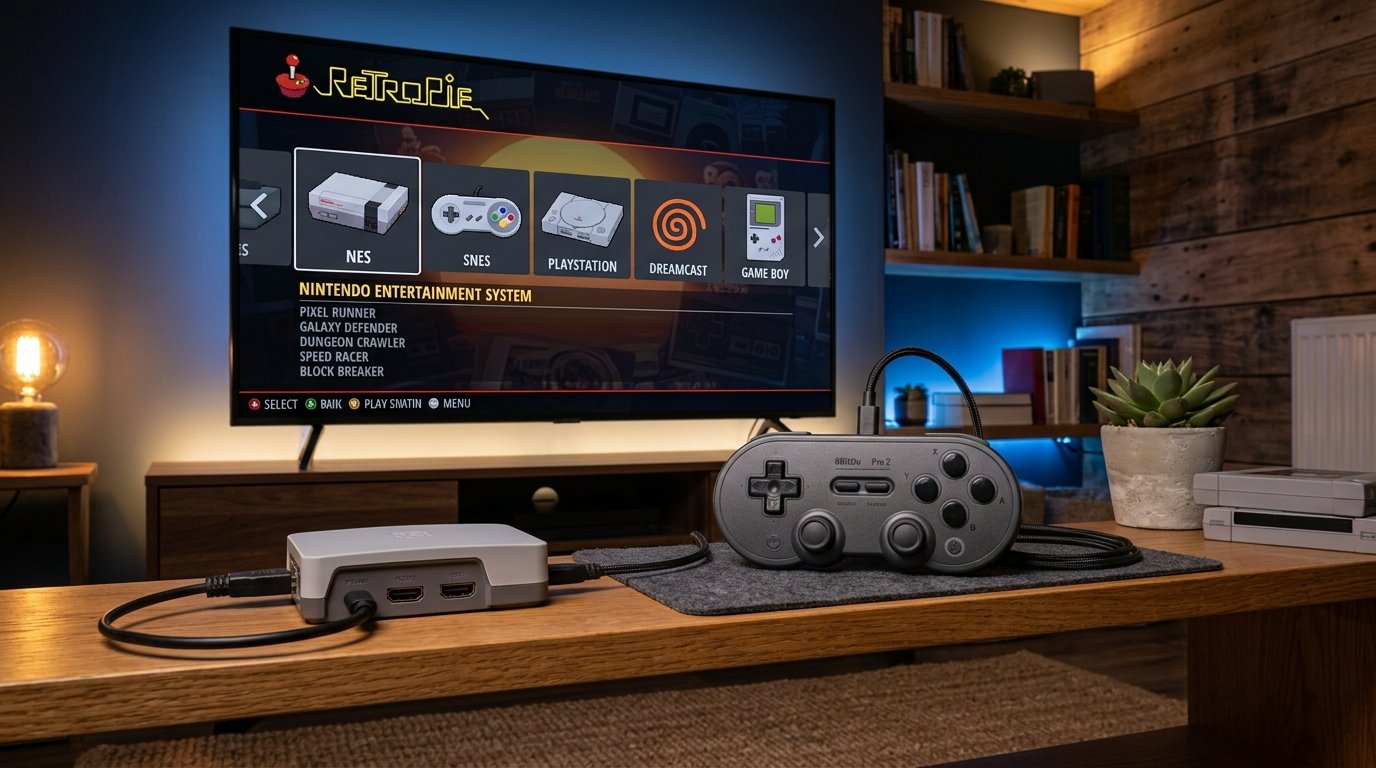
What if you could turn a small Raspberry Pi 5 into a compact retro gaming console for your TV? With RetroPie for Raspberry Pi 5, you can bring many classic gaming systems together in one simple interface.
The Raspberry Pi 5 has a much faster processor and graphics hardware than earlier Raspberry Pi models, making it a strong choice for retro gaming. Raspberry Pi says the Pi 5 can handle many classic systems, including PlayStation 1, Saturn, Dreamcast, NES, SNES, Game Boy Advance, Mega Drive, MAME, and more.
There is one important detail, though: RetroPie does not currently have a ready-made Raspberry Pi 5 OS image. Raspberry Pi’s current guidance says RetroPie can run on the Pi 5, but you need to install it manually on Raspberry Pi OS.
So, is RetroPie still worth using on a Raspberry Pi 5?
Yes, especially if you like RetroPie’s familiar EmulationStation interface and want to build your own retro gaming setup. But if you want a simple image that you can flash to a microSD card and start playing right away, alternatives such as Batocera or Recalbox may be easier.
This guide explains everything you need to know about RetroPie for Raspberry Pi 5, including installation, controllers, game files, BIOS files, performance, storage, cooling, common problems, and alternatives.
Can You Run RetroPie on Raspberry Pi 5?
Yes, you can run RetroPie on Raspberry Pi 5.
However, the installation process is different from using RetroPie on Raspberry Pi models that have official ready-made images.
Raspberry Pi’s current documentation says RetroPie works on the Raspberry Pi 5, but it needs to be installed manually on Raspberry Pi OS because there is no ready-made RetroPie OS image for the Pi 5.
This is the first thing you should know before starting your project.
You cannot simply open Raspberry Pi Imager, select a standard RetroPie Pi 5 image, flash it, and expect the normal setup process.
Instead, you start with Raspberry Pi OS and then install RetroPie.
That adds a few extra steps, but it also gives you more flexibility because you still have a normal Raspberry Pi OS installation underneath RetroPie.
What Is RetroPie?
RetroPie is a retro gaming platform built around several emulation projects and tools, including EmulationStation and RetroArch.
Its main purpose is to give you one interface where you can organize and launch games from different classic systems.
Instead of launching standalone emulators, RetroPie organizes libretro backends under one menu for many systems.
You can organize systems such as:
- Nintendo Entertainment System
- Super Nintendo
- Game Boy
- Game Boy Color
- Game Boy Advance
- Sega Genesis
- Sega Master System
- Atari
- Arcade systems
- PlayStation
- Dreamcast
- Nintendo 64
- And many others
The exact systems you can run depend on the emulator, game, settings, and Raspberry Pi hardware.
Raspberry Pi describes RetroPie as free and open-source software built around emulators such as EmulationStation and RetroArch.
Why Use RetroPie on Raspberry Pi 5?
The Raspberry Pi 5 is a strong upgrade for retro gaming compared with older Raspberry Pi models.
The Pi 5’s upgraded VideoCore VII GPU and modern drivers provide a noticeable performance uplift over earlier Raspberry Pi models.
Raspberry Pi’s own testing and examples show the Pi 5 running fifth- and sixth-generation systems, including PlayStation, Game Boy Advance, GameCube, and Dreamcast.
That gives you much more room to experiment than with a Raspberry Pi Zero or older Pi model.
The main benefits include:
- Small size
- Low power use
- HDMI output
- Wi-Fi
- Bluetooth
- USB controller support
- Large community
- Many emulator options
- Easy connection to a TV
- Custom case options
- Support for many classic consoles
You can turn it into a simple living-room console or build a complete arcade cabinet around it.
What You Need for RetroPie on Raspberry Pi 5
Before installing anything, gather the basic hardware.
You’ll need:
Raspberry Pi 5
A 4GB or 8GB model is more than enough for many retro gaming projects.
For older systems, even lower memory configurations can be sufficient. Raspberry Pi notes that more RAM is mainly useful when emulating newer systems.
Power Supply
Use a suitable USB-C power supply designed for Raspberry Pi 5.
A stable power source is important when running demanding emulators.
microSD Card
A good-quality microSD card gives you room for the operating system, RetroPie, emulator files, and game files.
A 64GB card is a comfortable starting point for many users.
If you plan to store a large collection, consider a larger card or USB/NVMe storage.
HDMI Cable
You’ll need an HDMI connection from the Raspberry Pi 5 to your TV or monitor.
Controller
You can use:
- USB controllers
- Bluetooth controllers
- PlayStation controllers
- Xbox controllers
- Retro-style USB controllers
- Arcade sticks
Raspberry Pi’s RetroPie guide confirms that both USB and various console-style controllers can be used.
Cooling
The Raspberry Pi 5 can run warm under heavy workloads.
A proper active cooler or suitable case fan can help keep temperatures under control during longer gaming sessions.
RetroPie for Raspberry Pi 5: Installation Overview
Because there is no ready-made Pi 5 RetroPie image, the process starts with Raspberry Pi OS.
The basic process looks like this:
- Install Raspberry Pi OS.
- Update the operating system.
- Configure the Raspberry Pi.
- Download RetroPie’s setup script.
- Install RetroPie.
- Restart EmulationStation.
- Connect your controller.
- Configure your controller.
- Add your legally obtained game files.
- Add BIOS files when required.
- Test your games.
- Adjust emulator settings when needed.
The process takes longer than flashing a dedicated retro gaming image, but it gives you a normal Raspberry Pi OS system underneath RetroPie.
For a detailed, step‑by‑step walkthrough with exact commands, GPU memory tuning, optional overclocking, and network ROM transfer examples, see this RetroPie on Raspberry Pi 5 installation guide.
Step 1: Install Raspberry Pi OS
Start by installing a current 64-bit Raspberry Pi OS version that supports Raspberry Pi 5.
You can use Raspberry Pi Imager on another computer to write the operating system to your microSD card.
During setup, configure:
- Username
- Password
- Wi-Fi
- Hostname
- Region
- Keyboard layout
Raspberry Pi’s RetroPie guide also recommends setting up networking and SSH during the operating system configuration stage when needed.
Once the card is ready, put it into your Raspberry Pi 5 and boot the system.
Step 2: Update Raspberry Pi OS
Before installing RetroPie, update your Raspberry Pi OS installation.
Open Terminal and run the normal package update commands for your Raspberry Pi OS release.
Keeping the operating system current can help prevent problems caused by outdated packages.
After updating, restart the Pi if the system asks you to do so.
Step 3: Install RetroPie
RetroPie provides a setup script that installs the required components.
Because the Pi 5 does not have a ready-made RetroPie image, this manual installation route is important.
The Raspberry Pi project specifically confirms that RetroPie can be installed manually on Raspberry Pi OS on the Pi 5.
During installation, the script may take some time.
Don’t shut down the Raspberry Pi while packages are being installed.
Once the setup finishes, you can launch EmulationStation and begin configuring your system.
Step 4: Configure Your Controller
Connect your controller to the Raspberry Pi 5.
If you’re using a USB controller, plug it into one of the Pi’s USB ports.
If you’re using Bluetooth, pair it through the appropriate Raspberry Pi settings.
RetroPie should detect the controller and ask you to configure its buttons.
You’ll normally see options for:
- D-pad
- A
- B
- X
- Y
- Start
- Select
- L
- R
- Analog sticks
- Hotkeys
Follow the on-screen instructions.
If your controller has buttons that don’t match the standard layout, map them carefully.
Step 5: Add Games to RetroPie
RetroPie needs game files to launch games.
These files are commonly called ROMs.
You should only use game files that you have the legal right to use.
Raspberry Pi’s own RetroPie tutorial explains that games can be transferred using a USB drive or over the network and also warns users about copyrighted game files.
One simple method is USB transfer.
USB method
- Format a USB drive as FAT32 or exFAT.
- Create a folder named
retropie. - Plug it into the Raspberry Pi.
- Let RetroPie create its directory structure.
- Remove the USB drive.
- Connect it to your computer.
- Place your game files into the correct console folders.
- Connect the USB drive to the Pi again.
- Wait for the files to transfer.
- Restart EmulationStation.
Raspberry Pi documents this USB transfer method in its RetroPie tutorial.
Where Should You Put ROMs?
RetroPie organizes games into console-specific folders.
For example, your USB drive may eventually contain folders such as:
retropie/
    roms/
        nes/
        snes/
        gba/
        genesis/
        psx/
        n64/
        dreamcast/
The exact folder names depend on the systems supported by your installation.
Put each game in the folder for its corresponding console.
After transferring the files, restart EmulationStation so the games appear in the menu.
What Are BIOS Files?
Some emulators need BIOS files.
A BIOS is system firmware associated with a particular console or computer.
Not every emulator needs one.
For example, some systems can run games without a separate BIOS file, while others depend on one for proper operation or better compatibility.
The required BIOS filename and location depend on the emulator.
If a game doesn’t start even though the ROM appears correctly, check whether the emulator requires a BIOS.
Only use firmware files you have the legal right to use.
RetroPie Raspberry Pi 5 Performance
One of the biggest reasons to choose a Pi 5 is its improved emulation performance.
Older systems should be relatively easy for the hardware.
Raspberry Pi says the 1GB Pi 5 can handle systems up to and including PlayStation 1, Saturn, and Dreamcast, along with systems such as NES, SNES, Genesis, GBA, MAME, ZX Spectrum, C64, and Amiga.
While the Pi 5 handles up to Dreamcast with ease, more demanding sixth-generation architectures such as the original Xbox generally require full desktop hardware and dedicated emulators.
But there is an important distinction:
Being able to launch an emulator does not mean every game will run perfectly.
Performance varies by game.
Which Consoles Work Well on Raspberry Pi 5?
The Pi 5 is particularly strong with older consoles.
You can expect good results from many games on systems such as:
| System | Raspberry Pi 5 Experience |
|---|---|
| NES | Excellent |
| SNES | Excellent |
| Game Boy | Excellent |
| Game Boy Color | Excellent |
| Game Boy Advance | Excellent |
| Sega Genesis | Excellent |
| Atari | Excellent |
| Arcade | Excellent for many titles |
| PlayStation 1 | Excellent |
| Dreamcast | Very good |
| Sega Saturn | Very good |
| Nintendo 64 | Very good |
| PSP | Game-dependent |
| GameCube | Game-dependent |
| Wii | Game-dependent |
| PlayStation 2 | Limited/game-dependent |
These are broad expectations rather than guarantees.
The exact result can change depending on the emulator, game, resolution, frame-rate target, and settings.
Can Raspberry Pi 5 Run PS1 Games?
Yes.
PlayStation 1 is one of the systems the Raspberry Pi 5 handles particularly well.
Raspberry Pi specifically includes PlayStation 1 among the systems that can run on even the 1GB Pi 5.
This makes the Pi 5 an excellent choice if your main goal is playing games from the 8-bit, 16-bit, and early 3D generations.
You can also increase visual quality with some emulators if the hardware has enough room.
Can Raspberry Pi 5 Run Dreamcast Games?
Yes.
Dreamcast emulation is one of the areas where the Pi 5’s extra CPU and graphics performance becomes useful.
Raspberry Pi’s current information lists Dreamcast among the systems that can run on the 1GB Pi 5.
Not every game will behave exactly the same, but many Dreamcast titles can be a good fit for this hardware.
Can Raspberry Pi 5 Run Nintendo 64 Games?
Yes.
Nintendo 64 emulation has been possible on earlier Raspberry Pi models, but the Pi 5 gives you more processing power and additional room for emulator settings.
Some games may still require individual configuration.
If one title has graphical glitches or performance problems, try another emulator or adjust its settings rather than assuming the whole system is incompatible.
Can Raspberry Pi 5 Run PSP Games?
Yes, but PSP performance is more game-dependent.
Some PSP games can run well.
Others are more demanding.
The Pi 5 gives you more power than older Raspberry Pi models, but you should not expect every PSP game to behave like it would on a modern PC.
If a game struggles, lowering internal resolution can help.
Can Raspberry Pi 5 Run GameCube Games?
The Raspberry Pi 5 is capable of GameCube emulation, but this is not the same as saying every GameCube game will run perfectly.
Raspberry Pi’s official retro gaming coverage notes that the Pi 5 can emulate sixth-generation systems including GameCube.
Expect more variation here than with NES, SNES, or PlayStation 1.
You may need game-specific settings.
Can Raspberry Pi 5 Run PS2 Games?
This is where expectations should be realistic.
The Raspberry Pi 5 is not a replacement for a gaming PC when it comes to modern 3D emulation.
Some lighter PS2 titles may be playable with the right emulator and settings, but many games will not deliver a stable experience.
If smooth 60 FPS PS2 and GameCube emulation is your main priority, portable x86 handhelds offer much greater raw computing power.
The Pi 5 is best viewed as a powerful retro gaming computer, not a modern console replacement.
Best Raspberry Pi 5 Storage for RetroPie
You have several storage choices.
microSD Card
This is the easiest option.
Advantages:
- Simple setup
- Low cost
- Easy to replace
- No extra hardware
For a moderate collection, a 64GB or 128GB card can be enough.
USB SSD
An SSD can provide faster storage and a large amount of space.
It’s a good choice for larger game collections.
NVMe SSD
The Raspberry Pi 5 can also be paired with NVMe storage through compatible hardware.
This is attractive if you want a larger, faster storage setup.
For a simple living-room console, however, a good microSD card is often enough.
Do You Need an Active Cooler for RetroPie?
For light systems, the Pi 5 may not need aggressive cooling.
For long gaming sessions and demanding emulators, active cooling is a good idea.
The Pi 5 can run hotter when its CPU and GPU are under sustained load.
A cooler can help maintain performance by keeping temperatures under control.
If you’re building a dedicated retro console, look for a case with good airflow or an active cooling solution designed for Raspberry Pi 5.
How to Improve RetroPie Performance on Raspberry Pi 5
If a game isn’t running smoothly, start with simple changes.
Lower the internal resolution
Higher rendering resolution puts more work on the GPU.
Try the native resolution first.
Use a suitable emulator
Different emulators can produce different results.
Close unnecessary programs
If you’re running other software in the background, close anything you don’t need.
Improve cooling
If the Pi becomes too hot, sustained performance can fall.
Use a good power supply
Power problems can cause instability and other strange behavior.
Avoid unnecessary visual effects
Shaders and other effects can add extra GPU work.
Test game-specific settings
One game may need different settings from another.
RetroPie Raspberry Pi 5 Controller Support
One of RetroPie’s strengths is controller support.
You can connect many different controllers.
Popular options include:
- Xbox controllers
- PlayStation controllers
- 8BitDo controllers
- USB arcade sticks
- Generic USB gamepads
- Retro-style controllers
- Bluetooth controllers
You can easily sync wireless gamepads from current living-room consoles for lag-free Bluetooth retro sessions.
For a classic console feel, a retro-style USB controller can be a nice addition.
For games that need analog sticks, choose a controller with dual analog controls.
Can You Use a PS5 Controller With RetroPie?
Yes, a PS5 DualSense controller can be used with compatible Raspberry Pi setups.
You can connect it through USB or Bluetooth, depending on your configuration.
Once connected, RetroPie can map the controller’s buttons to the RetroPad layout.
For older games, you may not need every modern controller feature.
A basic gamepad is often enough.
Can You Use Bluetooth Controllers?
Yes.
Raspberry Pi supports Bluetooth controllers, although the exact pairing experience can vary between controller models.
If you experience connection problems, USB is often the simplest fallback.
For a permanent arcade setup, wired controllers can also reduce concerns about battery charging and wireless connection issues.
RetroPie vs Batocera on Raspberry Pi 5
If you’re choosing a retro gaming platform for your Pi 5, RetroPie isn’t your only option.
Batocera is another popular choice.
The biggest difference is the installation experience.
RetroPie
- Built around Raspberry Pi OS
- Highly configurable
- Large community
- Familiar EmulationStation interface
- Manual installation required on Pi 5
- Good choice for users who enjoy customization
Batocera
- Dedicated retro gaming operating system
- Designed to boot directly into the gaming interface
- Pi 5 support
- Easier for a dedicated console
- Less need to build the system manually
Raspberry Pi currently lists Batocera, Recalbox, and Lakka as options that work on Raspberry Pi 5, alongside RetroPie.
Winner for easier setup: Batocera
Winner for customization: RetroPie
RetroPie vs Recalbox on Raspberry Pi 5
Recalbox is another strong alternative.
It is designed to provide a ready-to-use retro gaming environment.
Raspberry Pi’s current information lists Recalbox as working on Raspberry Pi 5.
If you don’t want to manually install RetroPie on Raspberry Pi OS, Recalbox may save you time.
RetroPie is more attractive if you want to build your setup around Raspberry Pi OS and have greater control over the underlying system.
RetroPie vs RetroArch
These names can be confusing.
RetroArch is not the same thing as RetroPie.
RetroArch is a front end and framework that uses emulator cores.
RetroPie is a larger retro gaming platform that combines tools such as EmulationStation, RetroArch, and multiple emulators into one system.
A simple way to think about it is:
RetroArch = emulator framework
RetroPie = complete retro gaming environment
They can work together.
In fact, RetroPie uses RetroArch for many systems.
Common RetroPie Raspberry Pi 5 Problems
Even after a successful installation, you may run into a few issues.
Games Don’t Appear
Check:
- ROM folder
- File extension
- File permissions
- Whether the game is supported
- Whether EmulationStation has been restarted
Controller Isn’t Detected
Try:
- Reconnecting the controller
- Using USB
- Re-pairing Bluetooth
- Restarting RetroPie
- Re-running controller configuration
Game Runs Slowly
Try:
- Lowering resolution
- Changing emulator
- Checking temperature
- Checking CPU usage
- Using a lighter graphics configuration
No Sound
Check:
- HDMI audio
- Audio output settings
- TV volume
- RetroPie audio configuration
- HDMI cable
Raspberry Pi users have also reported Pi 5 audio configuration issues in particular setups, so if HDMI audio isn’t working, checking the active audio device and Raspberry Pi OS configuration is worthwhile.
Should You Use RetroPie for Raspberry Pi 5?
That depends on what you want.
If your goal is:
“I want to insert an SD card, turn on my Pi, and immediately start playing.”
RetroPie may not be the easiest option on Pi 5 because there is no ready-made Pi 5 RetroPie image.
A platform such as Batocera or Recalbox may be simpler.
But if your goal is:
“I want a flexible Raspberry Pi system that can run RetroPie and still behave like a normal Raspberry Pi OS computer.”
RetroPie becomes much more interesting.
You get the retro gaming interface while keeping the underlying Raspberry Pi OS environment.
Who Should Choose RetroPie on Raspberry Pi 5?
RetroPie is a good fit if you:
- Enjoy DIY projects
- Want to customize your setup
- Already know Raspberry Pi OS
- Want EmulationStation
- Play many classic systems
- Want controller flexibility
- Don’t mind manual installation
- Want to build an arcade cabinet
- Want a living-room retro console
It’s less attractive if you:
- Want the fastest possible setup
- Don’t want to work with Linux
- Want a ready-made gaming image
- Mainly want newer console emulation
Best Raspberry Pi 5 Retro Gaming Setup
For a simple home console, this is a good starting configuration:
| Component | Recommendation |
|---|---|
| Raspberry Pi | Pi 5 4GB or 8GB |
| OS | 64-bit Raspberry Pi OS |
| Gaming platform | RetroPie |
| Storage | 64GB–128GB microSD |
| Cooling | Active cooler |
| Controller | USB or Bluetooth |
| Display | 1080p TV/monitor |
| Power | Suitable Raspberry Pi 5 USB-C supply |
| Network | Wi-Fi or Ethernet |
| Game storage | microSD, USB SSD, or NVMe |
You don’t need the most expensive setup.
For older systems, a basic Pi 5 configuration can already provide an excellent retro gaming experience.
Is 8GB RAM Necessary for RetroPie?
No.
For many classic systems, 4GB is more than enough.
Raspberry Pi notes that extra RAM becomes more relevant when you move toward newer and more demanding systems. Its current Pi 5 retro gaming guidance specifically says the 1GB model can handle many classic systems, including systems up to PlayStation 1, Saturn, and Dreamcast.
If you’re buying a Pi 5 mainly for NES, SNES, Genesis, GBA, PlayStation 1, and similar systems, you don’t need to buy the largest memory configuration just for RetroPie.
Is Raspberry Pi 5 Good for Retro Gaming?
Yes.
The Raspberry Pi 5 is one of the more capable Raspberry Pi boards for retro gaming.
Its extra CPU and graphics performance allow it to handle systems that were more difficult on older Pi models.
Raspberry Pi’s own retro gaming coverage highlights fifth- and sixth-generation systems, including PlayStation, Dreamcast, and GameCube.
For classic systems, the Pi 5 is more than capable.
The main limitation is not older consoles.
It’s the newer systems where emulation becomes increasingly demanding.
Frequently Asked Questions
Can you install RetroPie on Raspberry Pi 5?
Yes. RetroPie works on Raspberry Pi 5, but Raspberry Pi currently says it needs to be installed manually on Raspberry Pi OS because there is no ready-made RetroPie OS image for Pi 5.
Is RetroPie free?
Yes. RetroPie is free and open-source software.
Does RetroPie work on Raspberry Pi 5 4GB?
Yes. The Pi 5 4GB model is suitable for a wide range of retro gaming systems.
Does RetroPie work on Raspberry Pi 5 8GB?
Yes. The 8GB model provides more memory, although most classic emulation does not require that much RAM.
Can Raspberry Pi 5 run PS1 games?
Yes. Raspberry Pi says even the 1GB Pi 5 can handle PlayStation 1 emulation.
Can Raspberry Pi 5 run Dreamcast?
Yes. Dreamcast is among the systems Raspberry Pi lists as suitable for the Pi 5.
Can Raspberry Pi 5 run GameCube?
Yes, GameCube emulation is possible, although results vary considerably by game. Raspberry Pi’s official retro gaming coverage includes GameCube among the systems the Pi 5 can emulate.
Can Raspberry Pi 5 run PS2 games?
Some PS2 games may be playable, but compatibility and performance vary widely. The Pi 5 should not be treated as a full PS2 replacement.
Do I need an 8GB Raspberry Pi 5 for RetroPie?
No. For classic systems, 4GB is generally enough. More memory becomes useful mainly when experimenting with newer and more demanding software.
Is Batocera better than RetroPie on Raspberry Pi 5?
If you want a ready-to-use retro gaming operating system, Batocera may be easier. If you prefer customization and a Raspberry Pi OS-based setup, RetroPie may be the better fit.
Can I use a PS5 controller with RetroPie?
Yes. A compatible PS5 DualSense controller can be connected through USB or Bluetooth.
Can I add my own games to RetroPie?
Yes. You can transfer legally obtained game files through USB or over your network. Raspberry Pi documents both approaches for RetroPie.
Final Verdict: Is RetroPie Worth Using on Raspberry Pi 5?
So, is RetroPie for Raspberry Pi 5 worth setting up?
Yes — but it depends on the type of user you are.
The Raspberry Pi 5 is excellent hardware for retro gaming. It can handle classic systems with ease and gives you enough power to experiment with more demanding consoles. Raspberry Pi’s own current guidance lists systems from NES and SNES through PlayStation 1, Saturn, and Dreamcast as suitable for the Pi 5, while its retro gaming coverage also shows the board being used with sixth-generation systems such as GameCube.
The main drawback is the installation process.
There is currently no ready-made RetroPie OS image for Raspberry Pi 5, so you need to install RetroPie manually on Raspberry Pi OS.
That makes the choice fairly simple:
Choose RetroPie if you want:
- A customizable retro gaming system
- EmulationStation
- Raspberry Pi OS underneath
- Lots of configuration options
- A DIY gaming project
- Support for many classic consoles
Choose Batocera or Recalbox if you want:
- A simpler installation
- A dedicated gaming operating system
- Less manual setup
- A system that boots directly into a console-style interface
For someone who enjoys building and customizing a Raspberry Pi project, RetroPie remains a great choice for Raspberry Pi 5.
For someone who simply wants to flash an image and start playing, another retro gaming platform may save time.
Either way, the Raspberry Pi 5 gives you a small, affordable way to turn your TV into a surprisingly capable retro gaming machine.